The F150 truck series has a common issue where the trailer battery does not charge. This problem can occur in various models including the F250 and the 2021 F150. It is crucial to ensure that the battery is adequately charged and the wiring harness is free from damage or shorts. If these components appear to be in good condition, the Trailer Relay Module (TRM) may need calibration.

Several factors can contribute to the trailer battery not charging from the truck. One common issue is the trailer tow battery charge relay location. If the relay is not properly connected or is faulty, it can lead to charging problems. Another common issue is the trailer charging fuse. If the fuse is blown, there will be no power to the 7 pin trailer connector on the F150, resulting in the trailer battery not charging. This issue is also common in dump trailers and was notably prevalent in the 2015 F150 model, where users reported no trailer battery charging even when there was no trailer connected.
It is advisable to check all these components and ensure they are in good working condition. If the problem persists, it may be necessary to seek professional help or refer to a detailed article that provides a step-by-step guide to diagnosing and fixing the problem.
Troubleshooting: Trailer Battery Not Charging F150
Experiencing trailer battery charging issues with your Ford F150 can be quite frustrating, especially when you are planning a trip or are already on the road. This guide will help you diagnose and fix the problem, so you can get back on the road with peace of mind. Let’s get started!
Identifying the Problem
Common Symptoms of Trailer Battery Not Charging
If your trailer battery is not charging while connected to your Ford F150, you might notice some of these common symptoms:
- The trailer lights are dim or not working at all.
- The trailer’s electric brakes are not functioning properly.
- The trailer battery is dead even after a long drive.
- The trailer appliances or accessories are not working.
Tools Needed for Diagnosis
Before you start the diagnosis, make sure you have the following tools handy:
- Multimeter
- Battery charger
- Wire brush
- Basic hand tools (screwdrivers, wrenches, etc.)
Checking the Trailer Wiring
Inspecting the Wiring for Damage
The first step in diagnosing the problem is to inspect the trailer wiring. Check for any visible signs of damage such as cuts, frays, or exposed wires. Also, make sure the wiring connections are clean and secure. A loose or corroded connection can prevent the trailer battery from charging.
Testing the Wiring for Continuity
Use a multimeter to test the wiring for continuity. Start by disconnecting the trailer wiring from the truck. Set the multimeter to the continuity setting and test each wire by placing the probes on each end of the wire. If the multimeter does not beep, it means there is a break in the wire, and it needs to be replaced.
Testing the Truck’s Charging System
Checking the Alternator
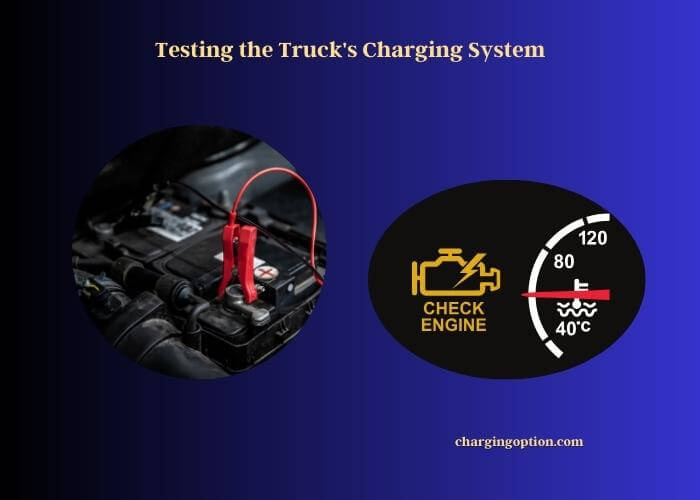
The alternator is responsible for charging the trailer battery while the truck is running. To check the alternator, start the truck and measure the voltage at the battery terminals with a multimeter. The voltage should be between 13.8 and 14.4 volts. If it is lower, the alternator might be faulty and needs to be replaced.

Testing the Voltage at the Truck’s Trailer Connector
With the truck running, use a multimeter to measure the voltage at the trailer connector on the truck. The voltage should be the same as the voltage measured at the battery terminals. If it is lower, there might be a problem with the truck’s wiring or the trailer connector.
Inspecting the Trailer Battery
Checking the Battery’s State of Charge
Use a multimeter to measure the voltage of the trailer battery. A fully charged 12-volt battery should read around 12.6 volts. If the voltage is lower, charge the battery with a battery charger and then test it again.
Testing the Battery’s Capacity
A battery’s capacity is its ability to hold a charge. To test the battery’s capacity, fully charge the battery and then connect it to a load, such as a light bulb. Measure the voltage of the battery after 1 hour. If the voltage drops significantly, the battery might be faulty and needs to be replaced.
Evaluating the Trailer Brake Controller
Testing the Brake Controller’s Output
The brake controller is responsible for sending power to the trailer’s electric brakes. To test the brake controller’s output, connect a multimeter to the brake controller’s output wire and the ground wire. Press the brake pedal and check the voltage reading on the multimeter. The voltage should increase as you press the brake pedal harder. If it does not, the brake controller might be faulty and needs to be replaced.
Checking the Brake Controller Settings
Make sure the brake controller settings are correct. Refer to the owner’s manual of your truck and trailer for the recommended settings. Incorrect settings can prevent the trailer battery from charging.
Data Analysis
Common Causes and Solutions
| Common Causes | Solutions |
| Damaged or loose wiring | Repair or replace the wiring |
| Faulty alternator | Replace the alternator |
| Dead trailer battery | Replace the trailer battery |
| Incorrect brake controller settings | Adjust the brake controller settings |
Chart:

Practical Solutions
Fixing Wiring Issues
If you found any damaged or loose wiring during your inspection, it needs to be repaired or replaced. Make sure all the connections are clean and secure. Use a wire brush to clean any corroded connections.
Replacing a Faulty Alternator
If the alternator is not providing the correct voltage, it needs to be replaced. It is recommended to have a professional mechanic replace the alternator as it can be a complex task.
Replacing a Dead Trailer Battery
If the trailer battery is dead or has a low capacity, it needs to be replaced. Make sure to properly dispose of the old battery and install a new one with the same specifications.
Adjusting the Brake Controller Settings
If the brake controller settings are incorrect, adjust them according to the owner’s manual of your truck and trailer. Incorrect settings can prevent the trailer battery from charging.
Preventive Measures
Regular Maintenance Tips
- Regularly inspect the trailer wiring for any signs of damage or wear.
- Check the trailer battery’s state of charge and capacity at least once a month.
- Regularly check the alternator and the brake controller for proper operation.
Best Practices for Longevity of the Trailer Battery and Charging System
- Do not leave the trailer battery discharged for extended periods.
- Avoid overloading the trailer as it can put extra strain on the truck’s charging system.
- Use a battery maintainer to keep the trailer battery charged when not in use.
Calculator
Below is a Trailer Battery Charging Time Calculator. This calculator will help you determine how long it will take to charge your trailer battery based on its capacity and the charging current.
Trailer Battery Charging Time Calculator
FAQs
Can the 2013 F150 Trailer Wiring Diagram Help in Solving Battery Charging Issues?
Yes, the 2013 F150 trailer wiring diagram can be helpful in solving battery charging issues as it provides a detailed layout of the electrical connections involved in the charging process. It can help you identify any wiring issues that might be preventing the battery from charging.
Why Does the F350 Have No Power to Trailer?
The F350 might have no power to the trailer due to several reasons such as a blown fuse, a damaged wiring harness, or a malfunctioning battery. It is essential to check all these components to identify and fix the issue.
What Is the Role of the Trailer Tow Battery Charge Relay?
The trailer tow battery charge relay is a switch that controls the power supply from the vehicle’s battery to the trailer’s battery. When the vehicle is running, the relay closes, allowing the vehicle’s battery to charge the trailer’s battery.
How to Charge a Dump Trailer Battery While Driving?
To charge a dump trailer battery while driving, you need to have a 7-pin connector that includes a pin for charging. Connect the trailer to the towing vehicle using the 7-pin connector, and the vehicle’s alternator will charge the trailer battery while driving.
Is There a Way to Run Dump Trailer Off Truck Battery?
Yes, you can run a dump trailer off a truck battery by connecting the trailer’s electrical system to the truck’s battery. However, this will put an additional load on the truck’s battery and alternator, so it is recommended to use a separate battery for the trailer.
What Could Be the Reason for No Power to 7 Pin Trailer Connector F150?
The reason for no power to the 7 pin trailer connector on an F150 could be a blown fuse, damaged wiring, or a malfunctioning relay. It is recommended to check the fuse box, wiring, and relay to identify and fix the issue.
Why Is the Travel Trailer Battery Not Charging When Plugged In?
The travel trailer battery might not be charging when plugged in due to several reasons such as a faulty battery, damaged wiring, or a malfunctioning alternator. It is essential to check all these components to identify and fix the issue.
Diagnosing and fixing trailer battery charging issues in your Ford F150 can be a daunting task, but with the right tools and knowledge, it is definitely doable. Remember to regularly inspect and maintain your trailer’s electrical system to prevent any issues in the future. Safe travels!
Did you find our blog helpful? Then consider checking:
- Winter Care: Should You Keep Your Electric Golf Cart Plugged In?
- Troubleshooting the Dodge Ram Charging System Problem
- 2022 Honda Passport: Troubleshooting Wireless Charger Issues
- 6 Best Home Chargers for Kia Niro EV in 2023
- Car Alarm Goes Off When Charging Battery: Solved!
- Can You Charge a Wheelchair Battery With a Car Charger?
